NOTE: Requirements Before Listings are Live
🔒 Make sure the following is complete before listing your trips:
- ✅ Operator Profile Completed
- ✅ Credentials Submitted and Approved (Tour Operator License, Insurance, etc.)
- ✅ Tour Operator Agreement Signed
Need help with your credentials? Click here to open a support ticket
Access your DASHBOARD HERE
💡 Quick Tips:
- Use real images of your trips and guests
- Keep titles clear but compelling
- Highlight what’s included (gear, drinks, guides, etc.)
- Respond quickly to booking requests and questions
- Keep your availability up to date
HOW TO CREATE YOUR TRIPS:
Step 1: Access Your Dashboard
Go to: Dashboard > Trips > Add New Trip
This will take you to the trip creation page where you can add all trip details.

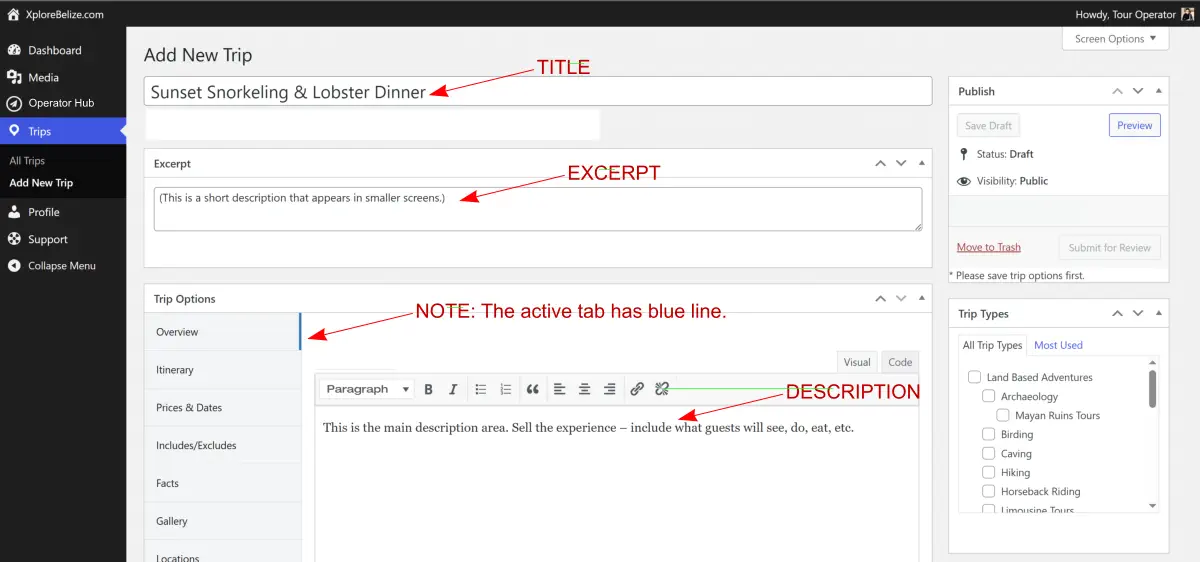
Step 2: Enter Basic Trip Details (Overview Tab)
- Trip Title: Make it exciting and descriptive (e.g., “Sunset Snorkeling & Lobster Dinner”)
- Excerpt: A short description that appears in smaller screens.
- Description: Sell the experience – include what guests will see, do, eat, etc.
Note: Always remember to scroll to bottom of page and SAVE CHANGES often so you do not lose your work!
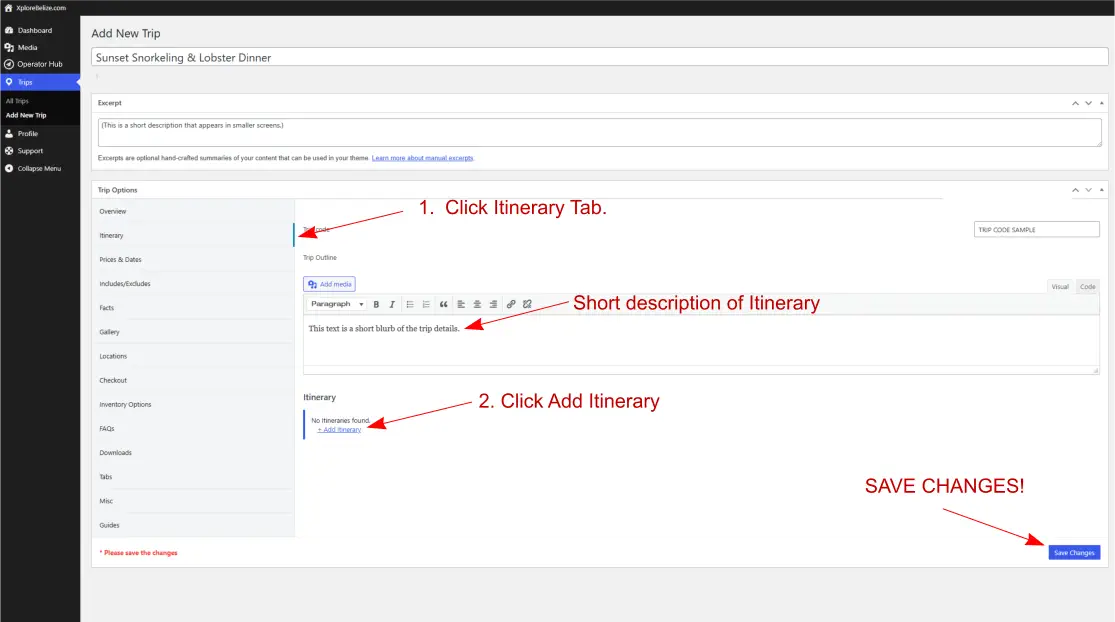
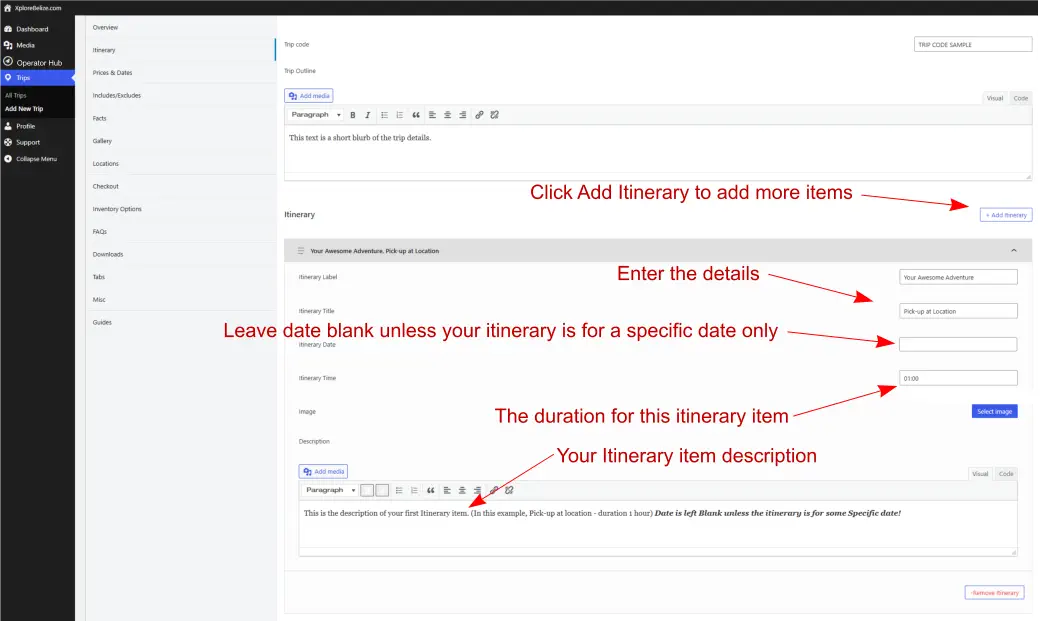
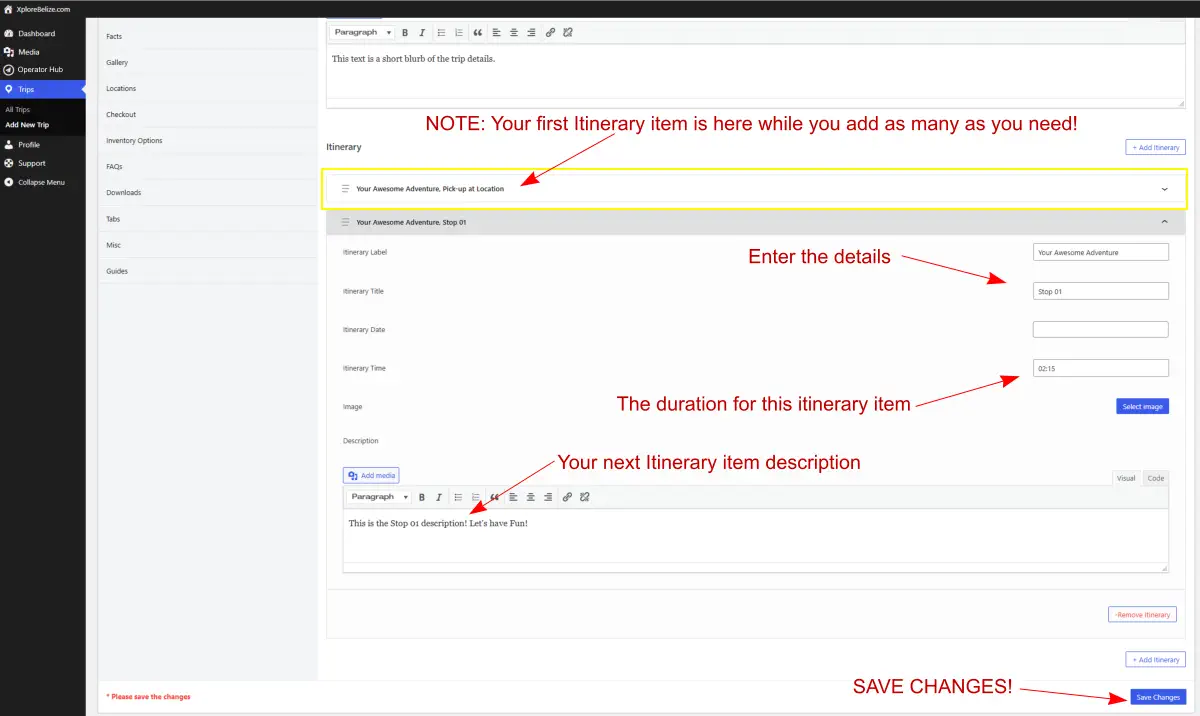
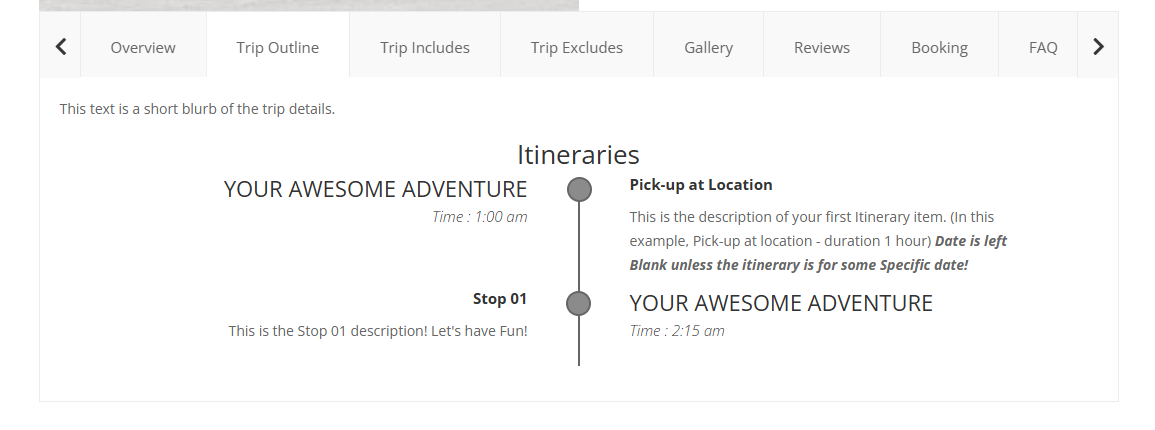
Step 3: Trip Itinerary & Highlights (Itinerary Tab)
- Break down the trip by time or activities (e.g., 9AM – Meet at dock / 10AM – Snorkel Hol Chan)
- Add what to bring, level of difficulty, and unique highlights
- Include rest periods, meals, and key moments
- Add descriptions for each section to build excitement
Step 4: Includes / Excludes
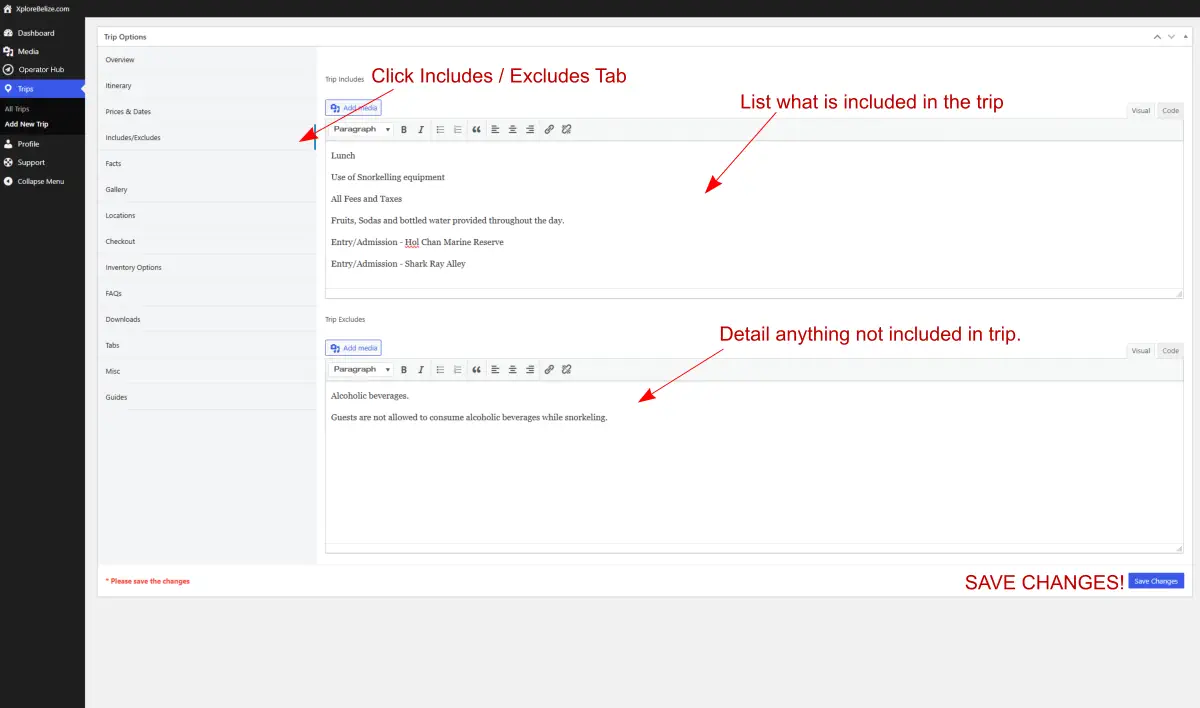
Be transparent about what’s included, for example:
Includes:
- Licensed guide
- Equipment (kayaks, snorkels, life vests)
- Lunch, drinks, park fees
Excludes:
- Transportation to meeting point
- Personal items
- Tips
Step 5: Add Gallery Images
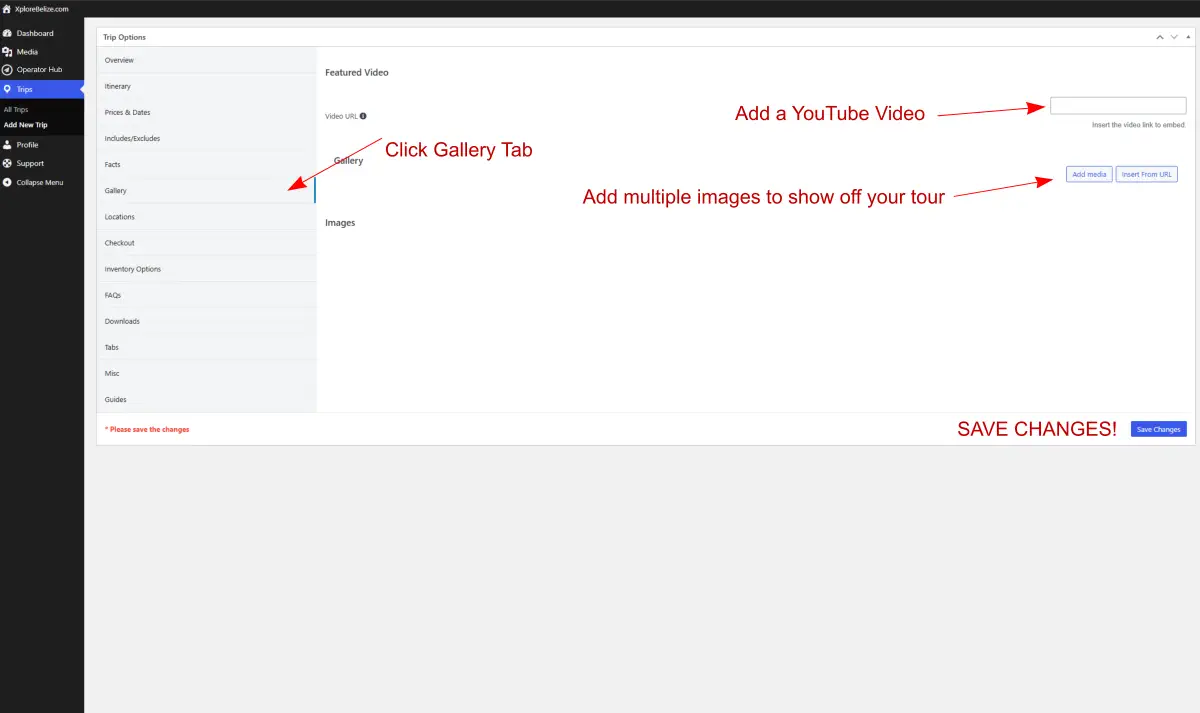
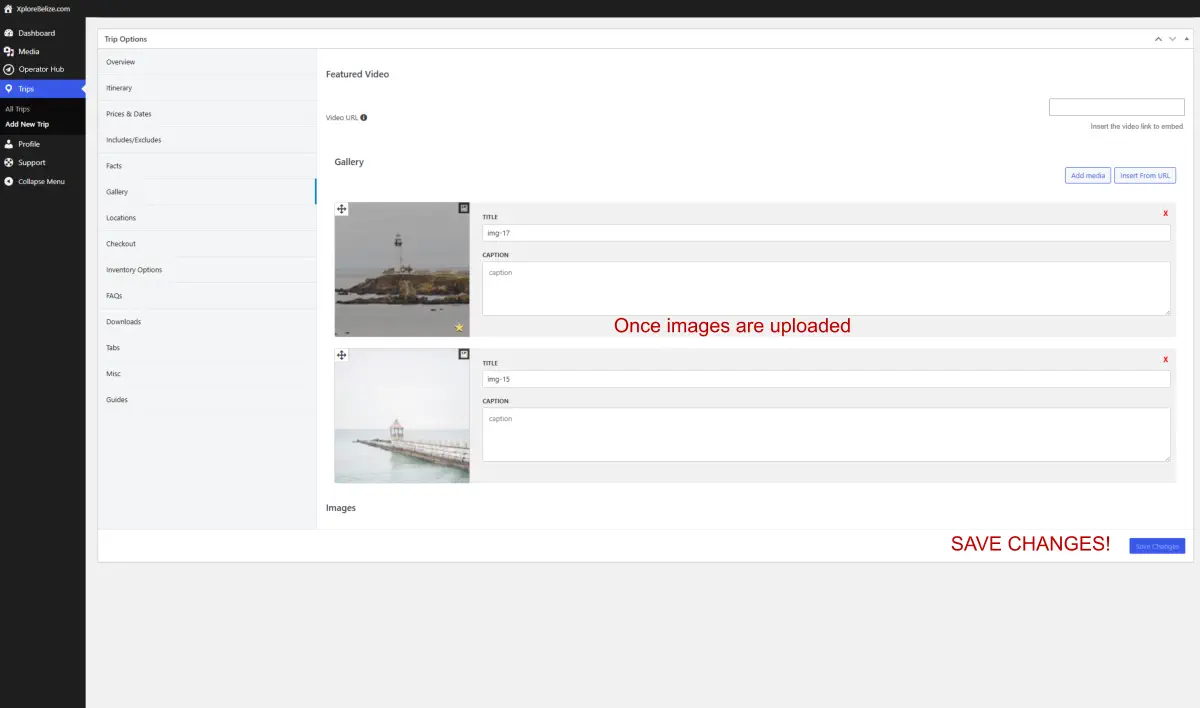
Images: Use a high-quality, landscape-style images
Add multiple images to show off your tour — think scenery, happy guests, action shots, etc.
Add YouTube video’s by url.
Reminder: All uploaded images and videos must not contain identifiable branding or promotional content such as:
- Logos, business names, or contact info
- Website URLs, phone numbers, or email addresses
- Branded watermarks or signage
This ensures all marketing and communication stays within the XploreBelize platform.
Content that violates this policy will be rejected in accordance with the Tour Operator Agreement
✅ Focus on clean, experience-driven visuals that showcase your tour — we’ll handle the rest!
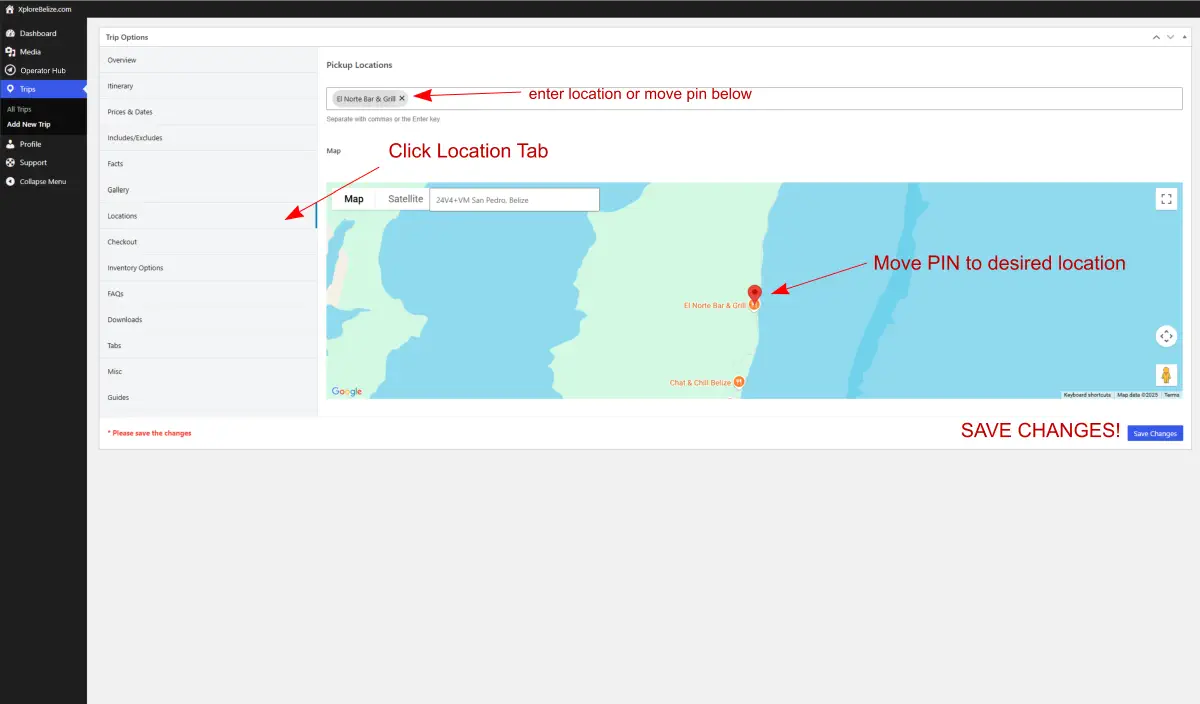
Step 6: Location & Meeting Point
Pin the location where guests should meet you.
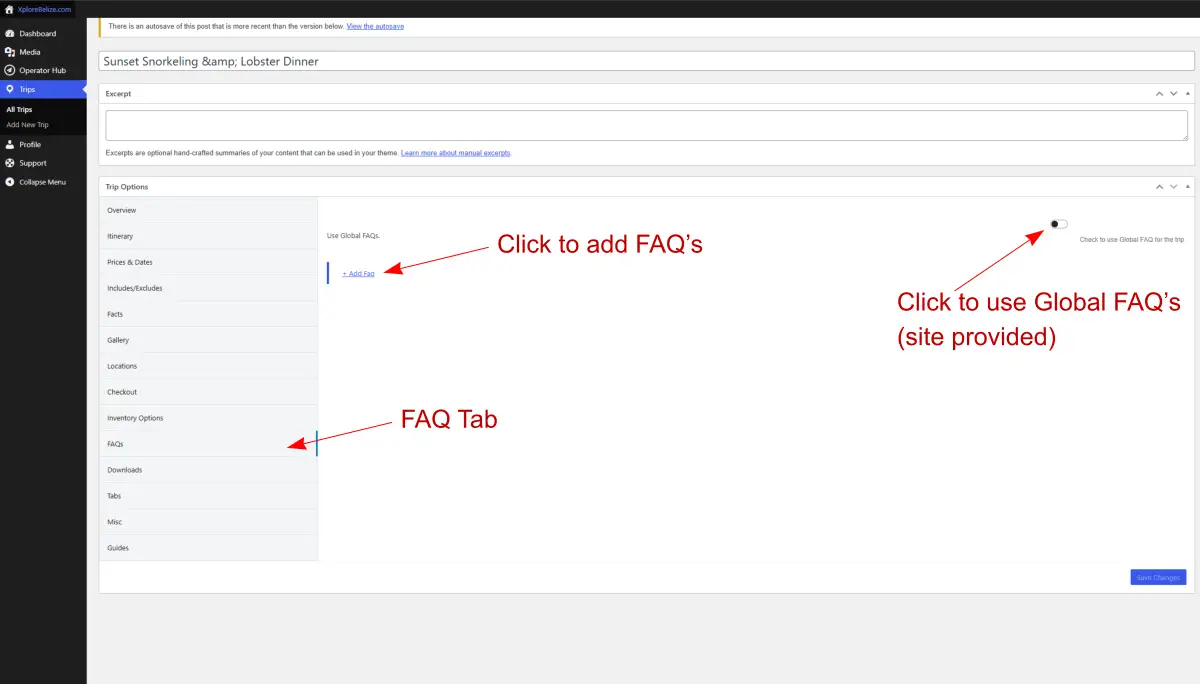
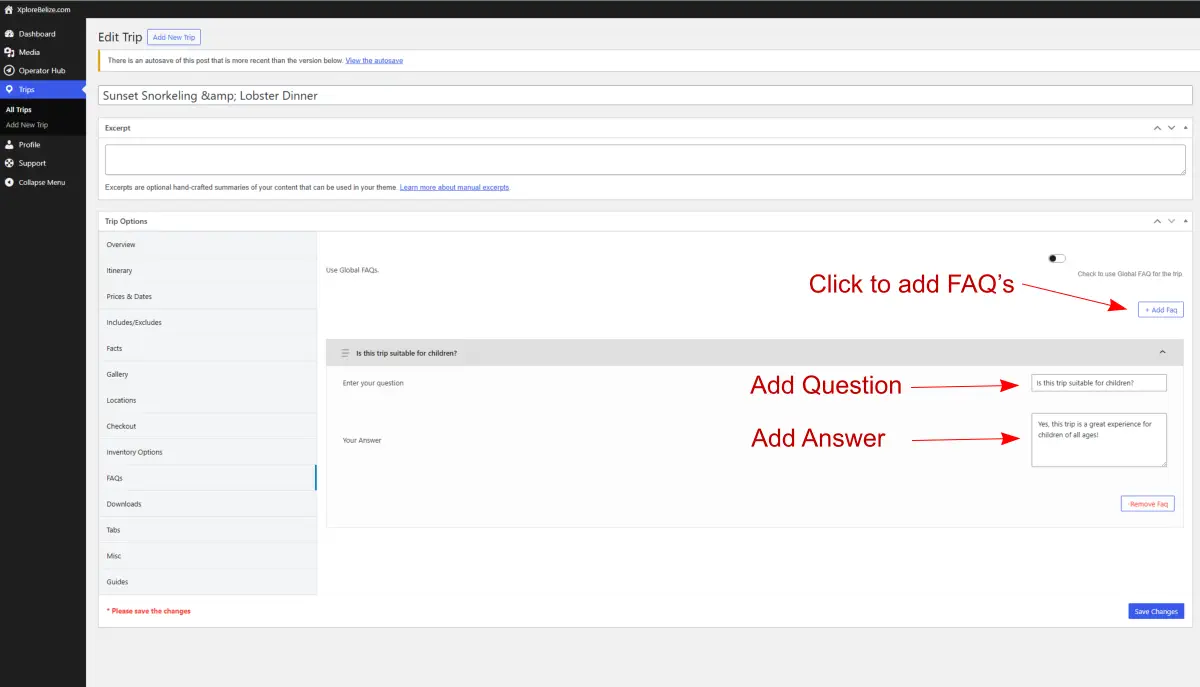
Step 7: FAQ’s
Answer common traveler questions:
-
What should I bring?
-
What happens in bad weather?
-
Is this trip suitable for children?
-
Are dietary restrictions accommodated?
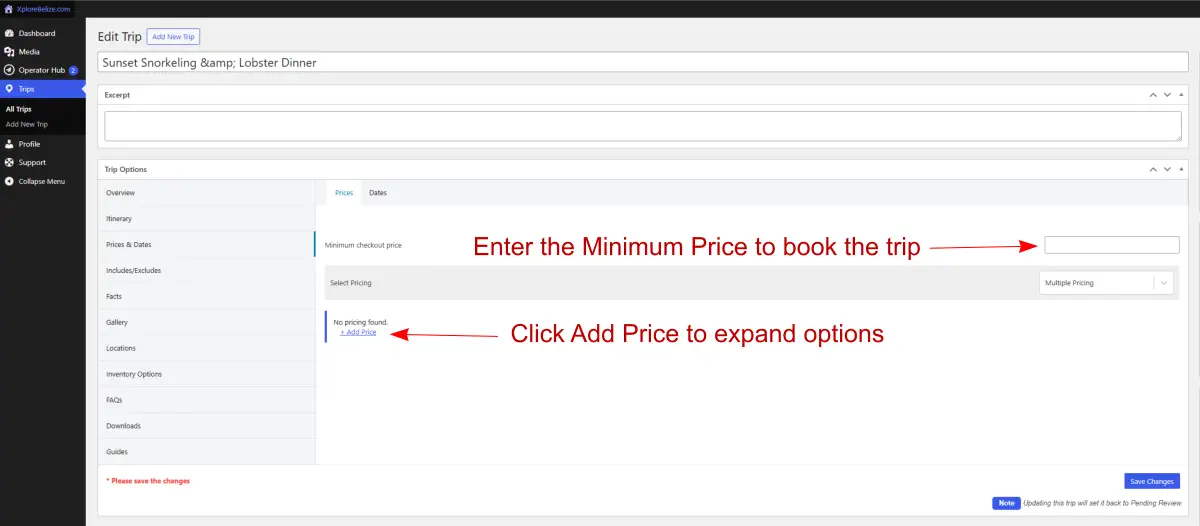
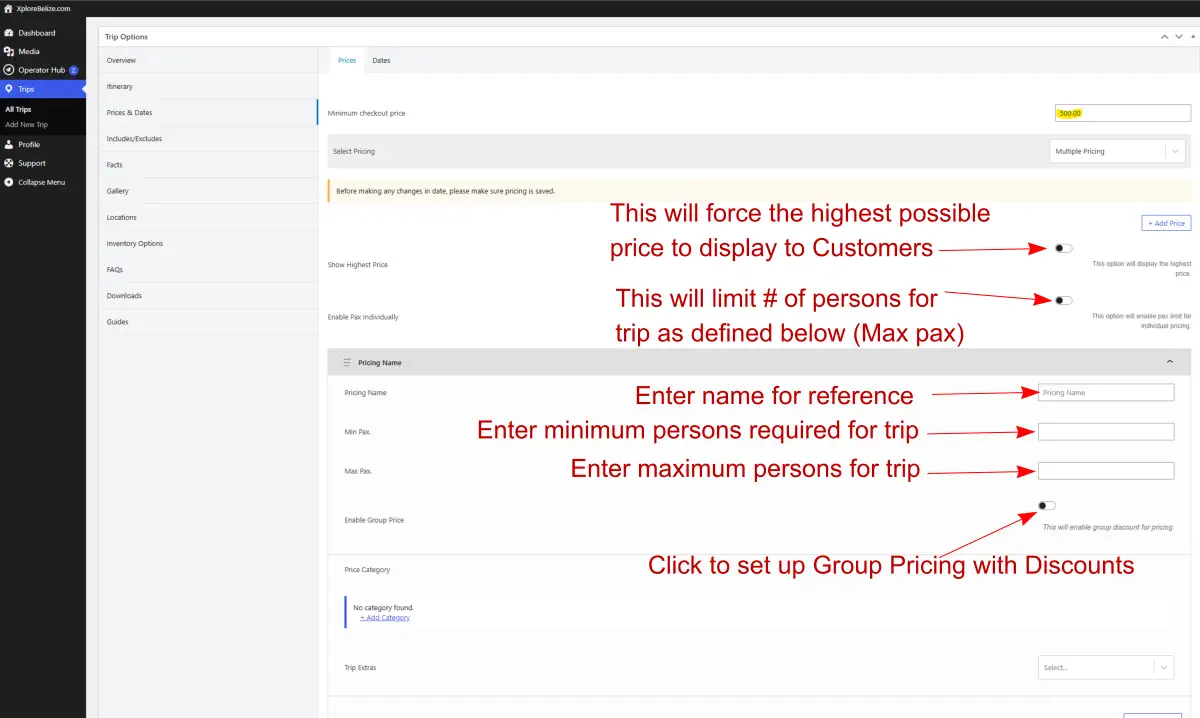
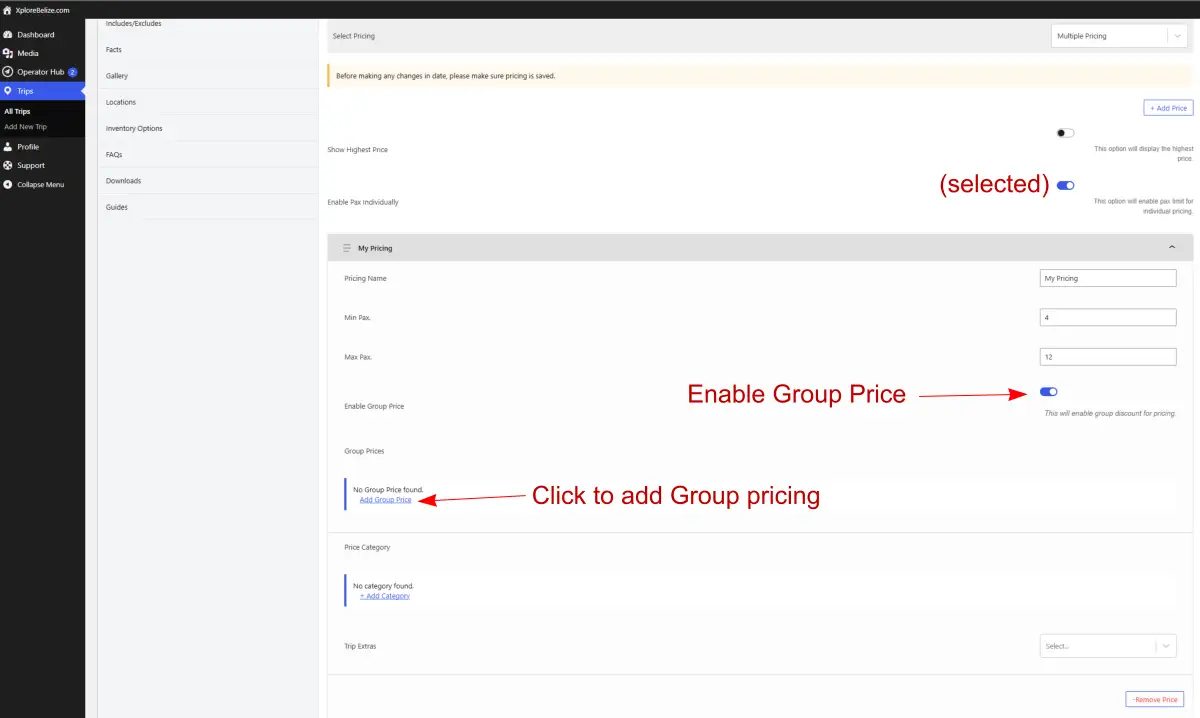
Step 8: Prices & Dates
In this section, you are able to set your pricing and availability for the Trip:
- Price Type: Per person or per group
- Price Value: Input base rate
- Sale Price (optional): Offer promotional pricing
- Trip Dates: Fixed departures or “Always Available”
Final Step: Save & Submit for Review
Once your listing is complete, click Submit for Review at the top right of the page – our team will then check the listing. We will let you know if anything needs attention. Once approved your listing will be published and ready to book!
Don’t Have Time to Build Your Listing?
– Let us handle it for you!
If you’d rather skip the setup process, our team can create a complete, optimized tour listing on your behalf — including formatting, image selection, itinerary structuring, and SEO-friendly copy.
✅ Just complete a short form with your trip details and upload your images.
✅ We’ll do the rest — fast, clean, and fully compliant with our platform standards.
✅ One-time setup fee: $50USD per listing
⚡️ Save time. Get listed faster. Start booking sooner.
